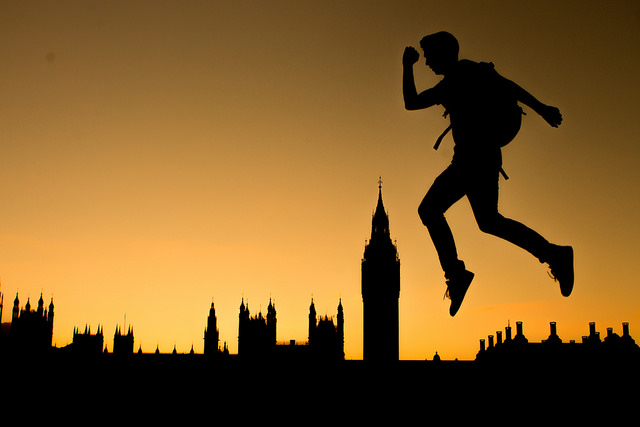
In this lesson we are going to see how your camera can be tricked into taking a silhouette picture. Sometimes tricking your camera can turn out to be a very good thing. A silhouette is when a person or thing is very dark in your picture. The background on the other hand should be bright.
Silhouettes create mystery and allow the viewer to use their imagination to complete the picture.

Step 1 – Find an Interesting Subject
You cannot use the subject’s colors or textures to make the photo pleasing so you have to rely on its shape. Look for subjects that are recognizable by shape alone.
In the photo above you can tell that the main subject is a person jumping. You may also recognize the buildings in the background. Scroll down to find out where these buildings are located.

If you guessed the British Houses of Parliament and The Clock Tower that houses Big Ben in London you were right. Here is a picture during the day.
Pick one of these subjects for a silhouette photo:
• Family members
• Friends
• Toys
• Buildings
• Animals
• Your bicycle

If you are taking a silhouette of a person have them stand sideways to the camera. This way you will be able to see their eyelashes, nose, and lips. You can probably recognize your family members by looking at the profile of their face. If they are looking straight into the camera you will lose all the detail in their face.
Step 2 – Turn Off Your Flash
The flash will light up your subject which is not the effect we are looking for. Instead have your parents help you turn off the flash on your camera.
If your camera does not allow you to turn off the flash in Auto mode try switching to Program mode. This is the big “P” on your mode dial.
Step 3 – Put Your Subject in Front of a Bright Background
A sunset or sunrise is best for this. See how the flower below is placed right in front of the sunset.

You can also use window light as shown in the picture of the toy soldiers below. Find the brightest window in your house. Then create an action scene by setting up some toys on the window sill.

Step 4 – Trick Your Camera
We must make the camera think that the background is the most important part of this picture.
Use Auto Mode
Your camera takes a meter reading of the light when you press the shutter halfway down. Therefore you can point your camera at the brightest part of the picture and press the shutter halfway down and hold it.
While still holding the shutter halfway down move your camera back to frame your subject where you want it. Finally, press the shutter button all the way down to take the picture.
Some cameras have an AEL button on the back. This stands for Auto Exposure Lock. Instead of pressing the shutter halfway down you can hold down the AEL button instead.
Use Manual Mode
If you are having trouble tricking your camera you might have to switch to manual mode. Turn your mode dial to M. This means you are now in complete control of how light or dark your subject is. Start with these camera settings:

- Exposure Mode: Manual (M)
- Aperture: 8
- Shutter Speed: 250
- ISO: 100
Take the picture and then review it on the LCD screen.
- If your subject is not dark enough increase your shutter speed to 500 and try again.
- If your picture is too dark decrease the shutter speed to 125 and try again.
Keep experimenting with different shutter speeds until you get the picture just right.
Review
- Find an interesting subject
- Turn off your flash
- Put your subject in front of a bright background
- Trick your camera

Photo Assignment
Take a silhouette picture
Click the link above for a printable photo assignment worksheet.
Love these! Do you have any lessons on white balance and post processing for kids?
White balance is a great idea for a lesson, I’ll get to work on that. Also, I have thought about writing lessons on post processing using GIMP. This is a free photo editor that is comparable to Photoshop. Would you like to see lessons using GIMP?
I have Photoshop and Lightroom, but I would be interested in teaching my children with any post processing resources. 🙂 We are excited to start with the 16 lessons you have so far. They look great!